Author Archives:

Autodesk Revit: Dynamo

One of the things I like to do most, is automate workflows. Specifically 3D-CAD and/ or BIM workflows.

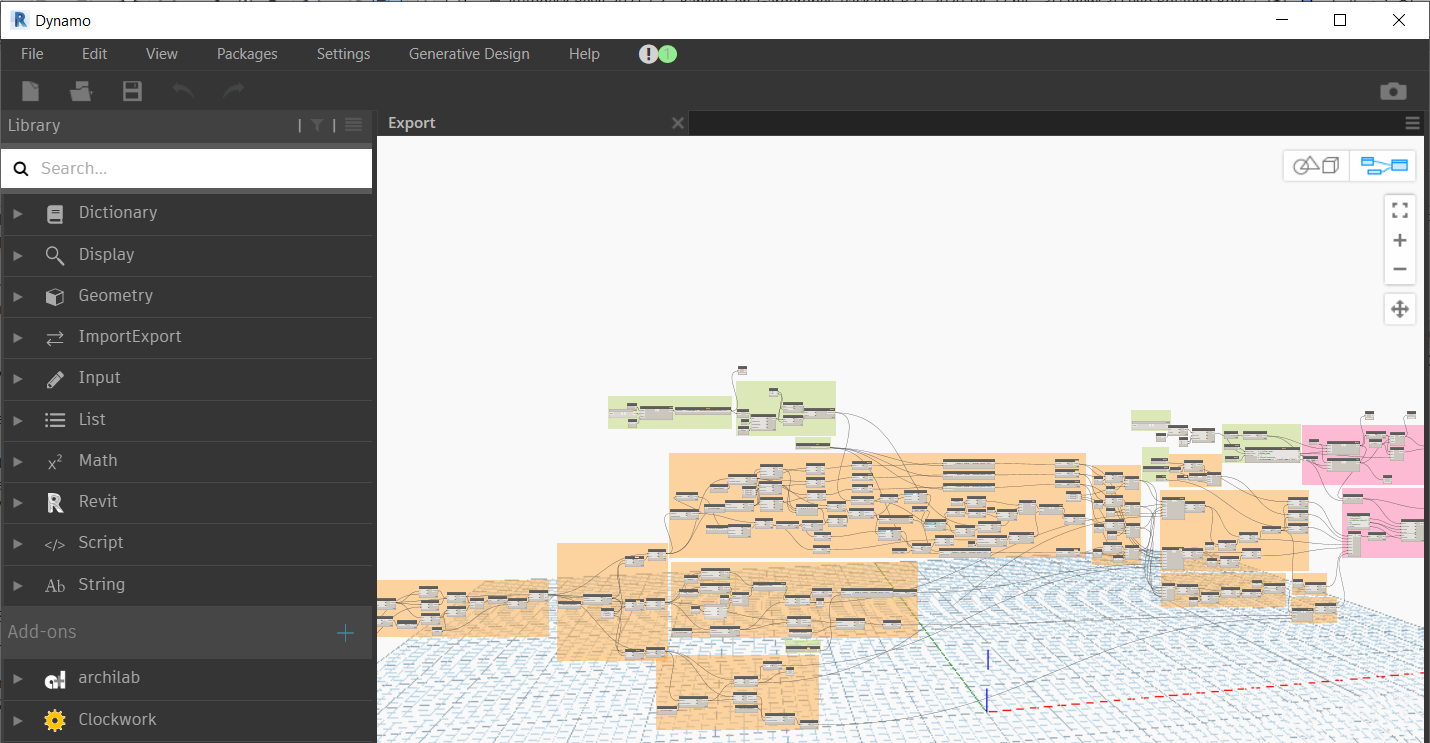
Dynamo for Revit is a visual programming tool which allows for this type of automation.

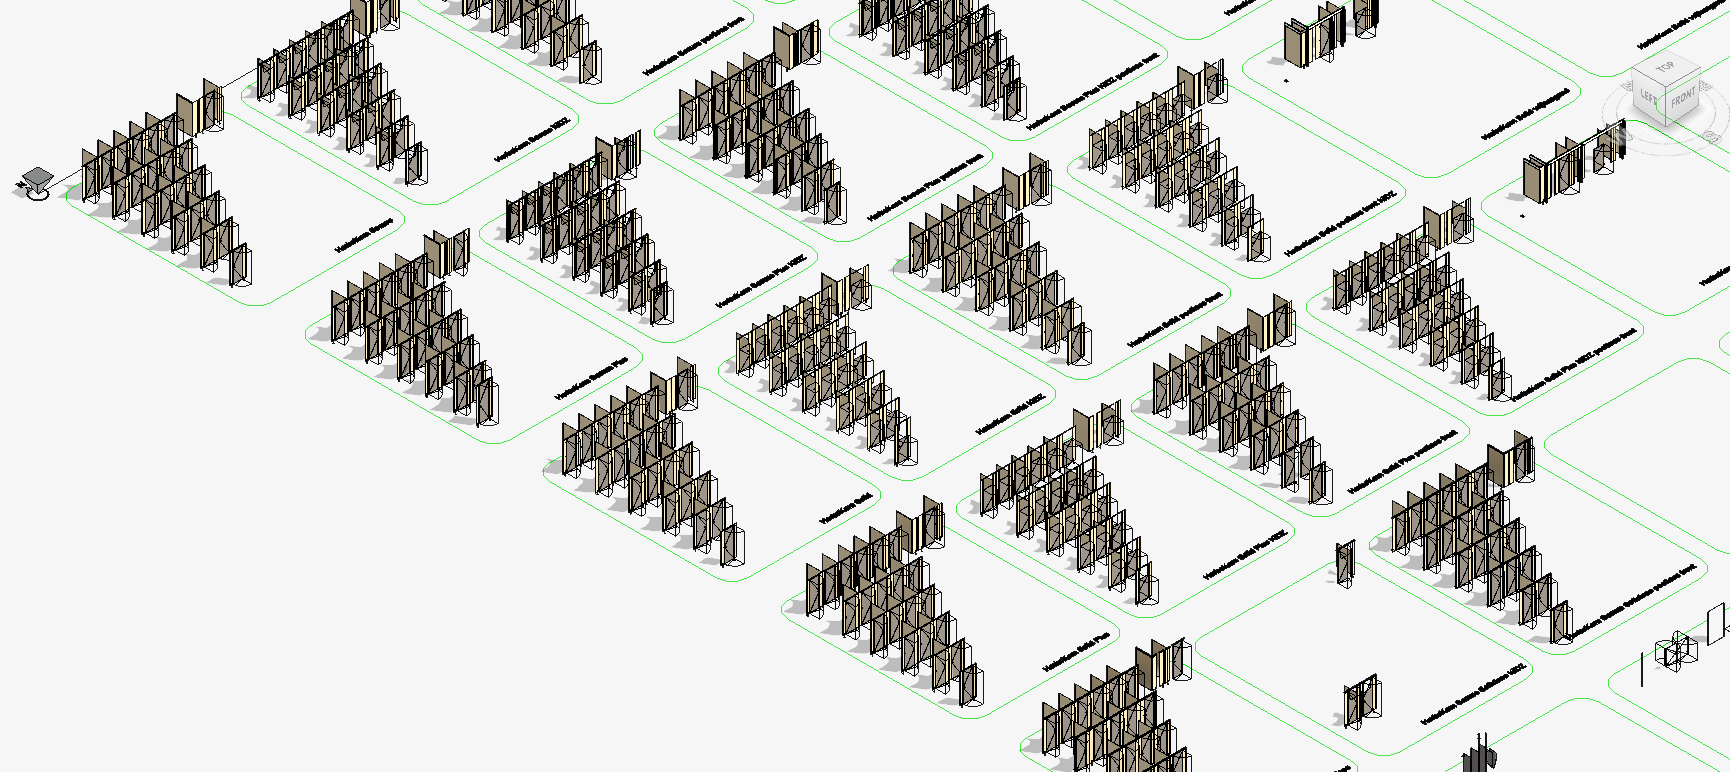
Since I’ve started using it, I have made numerous scripts, doing simple things as copying an annotation to all the sheets within a project, to more complex scripts that export all parts of a certain category in a specified orientation to separate files.

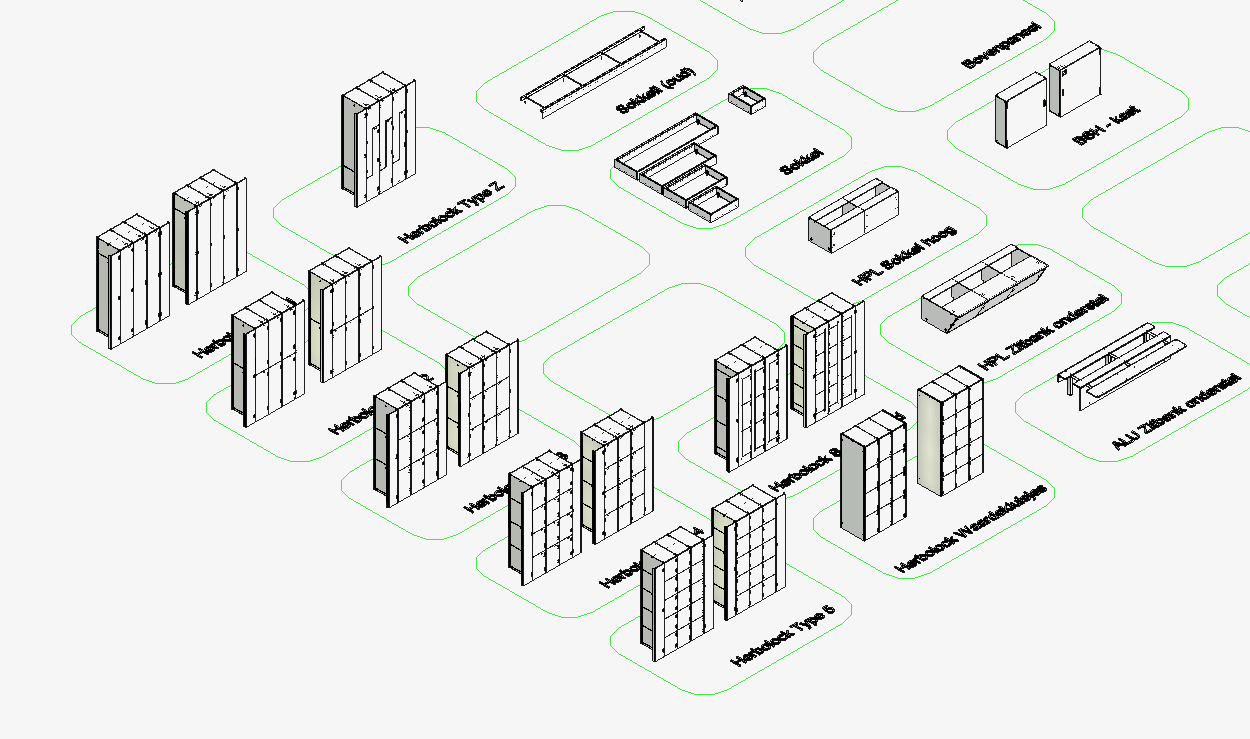
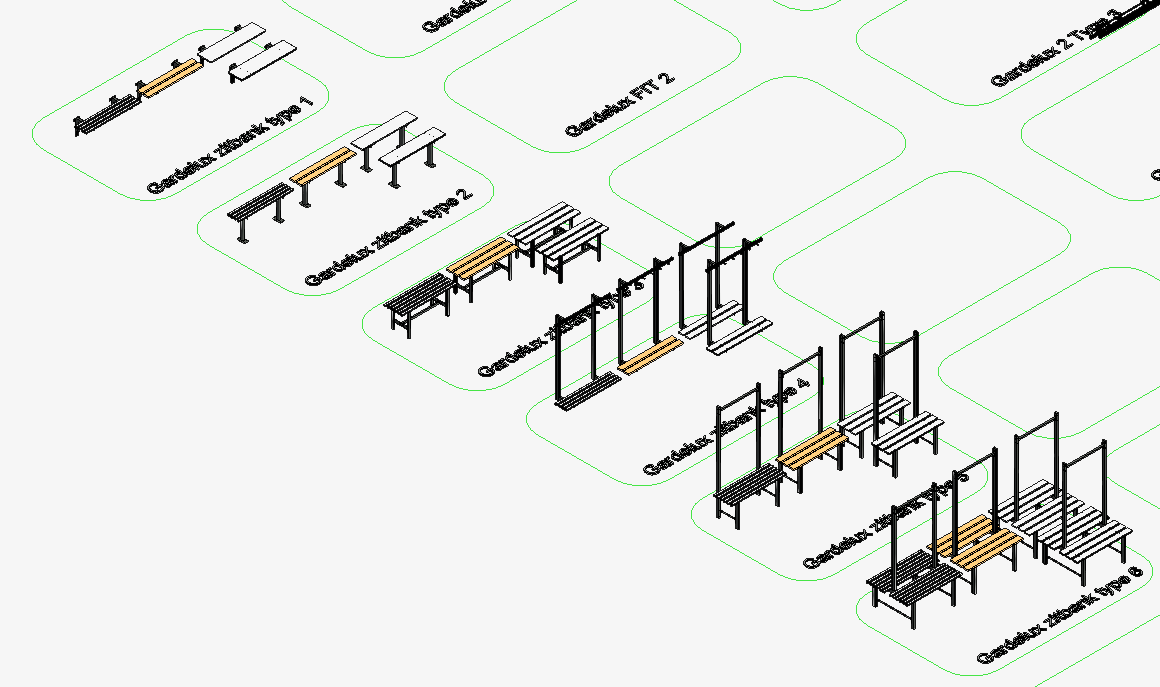
Or a script that exports the full bill of materials of an entire project to a single excel file. In which it automatically adds all pieces profiles, panels, etc. to: m^2/panel color and meters/ profile. So that this file can be directly imported into the ERP system.

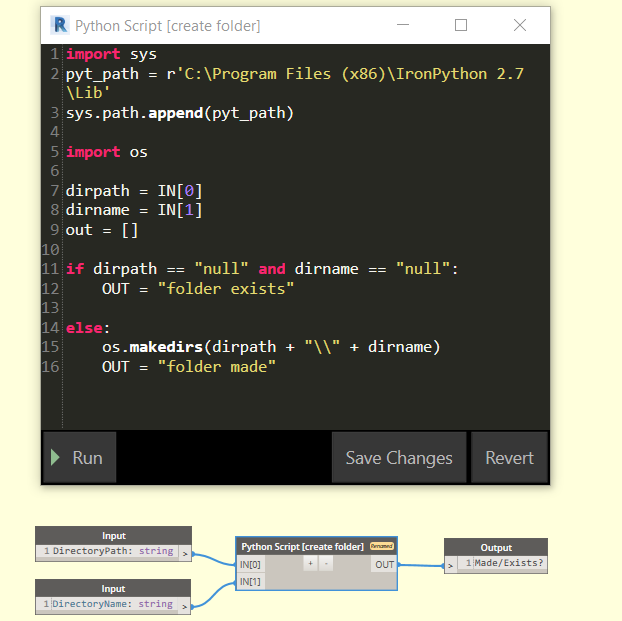
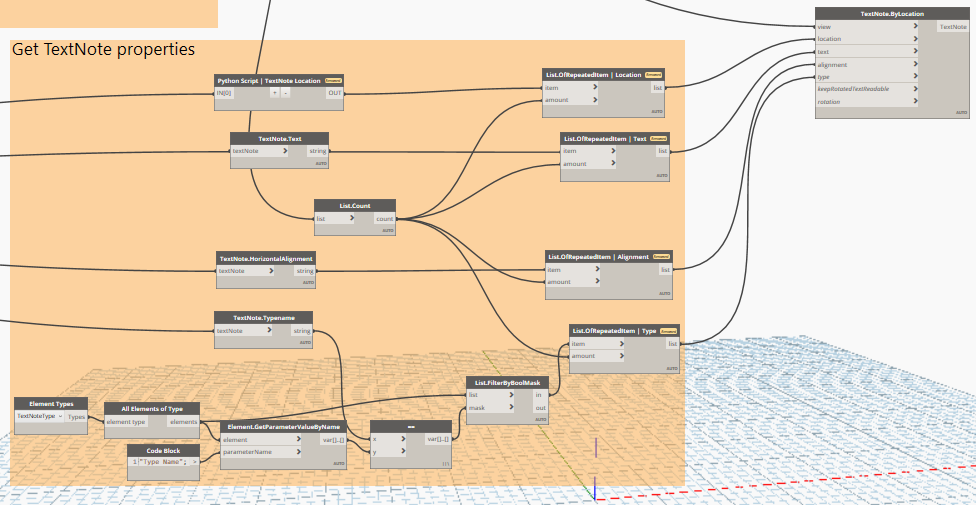
Also, in the past couple of years sometimes I ran into the limitations of Dynamo. So I learned how to make my own custom nodes and use Python scripts to overcome these limitations when necessary.

Autodesk Revit: Product Libraries

In the past couple of years I have built Revit model libraries from the ground up. Currently I’m maintaining and updating these with new features.

These libraries include amongst others; cubicles, lockers and benches.

Solidworks: Macro’s

For Solidworks, I have currently created two macro’s thus far.

One exports six file types at once. The other checks a folder for .SAT files and converts them all -fully automated- to .STEP files using Solidworks.

Solidworks: equation driven assembly

This is a Solidworks assembly I’ve made of the Gardelux 1 from Hermeta.

This assembly is equation driven, meaning, the position and number of hooks, supports, etc., are a dependent of the extrusion length.

By simply filling in the length needed, the entire product is generated.

Below are examples of 1, 1,5 and 2,5 meter in length.

1 m

1,5 m

2,5 m

Adobe illustrator: Export Macro

For Adobe illustrator I’ve recently created an export macro that, with a single click, exports every wanted PNG format and an EPS file in seperate subfolders.

3D Printing

3D printing for me, is just as much as a hobby as i use it for work. Below are some examples of 3D prints.

Here’s an example of a project I did for someone to redesign a part of a model kit. The part that came with the kit was from a previous model year of the truck.

Old part

The goal was to create the part for the current model year. Below is one of the example images i used and the end result.

Example image
New part

Another thing I made is a replica of a KitchenAid

Below is a 3D printing project which I did in my spare time.
I had the idea to print some custom housings for my USB drives.

For the roller coaster cart, a lot of details had to be simplified or left out to make it 3D-printable and usable.

Below to the left is the second version and to the right, the first version.

And the end result:

The same idea was also used to create a USB flash drive in the shape of a coat hook.

Product visualization

In the last couple years I’ve made several visualizations and animations of products.
This is an example of some of the work I did for Hermeta.

Design For Assembly

This was an assignment to redesign an existing product and to optimize it for assembly.
An important part of this, is the reducing of the number of parts.

For this assignment, I chose to use the Silver River II 3,5″ HDD external USB/E-SATA housing from Thermaltake.

his product had 9 parts, plus a connector from the LED cable, the LED glass, two stickers and 8 screws.
So there was room for improvement.

In the new housing, that was optimized for assembly, there were only 6 parts left and no screws.

Prototyping

This was an assignment to create a scale prototype of an existing design chair.

At first, I created a 3D model of the chair so I had all the necessary dimensions and drawings to make the parts and create a mold in order to vacuum form the seat.

In the image below, the left side is the 3D model and on the right is the original chair.

Up next, was the actual vacuum forming of the seat.

After this had been done, the frame could be soldered and the legs were made.

Painting the seats:

After adding the 3D printed parts to the bottom of the seat, the miniature chairs could be assembled.

Screen render

This is a 3D model of a PC screen I made in my first year at Hogeschool Rotterdam.

Concept Car

In the first year at Hogeschool Rotterdam, I chose to follow the optional course in automotive design.

During this course, the group that I was part of designed the concept below, which I made a global 3D model from.

Remote control

This was an assignment during my time at Hogeschool Rotterdam, to design a remote control that was fully producible.

Injection mold design

The design of injection molded parts was a course I followed at Hogeschool Rotterdam.
The assignment was to design an injection mold for a plastic bottom shell of a remote control.

In the cross-section below, the structure of the mold can clearly be seen.

Furthermore, a simulation was run, to check whether the part was actually producible and if the injection point was in the right location.
The images below show the filling time and the sink marks.

Tower for aerial platform training

While working for HDW Nederland b.v. , I got the assignment to design a frame around an existing tower, for use during aerial platform training.

Sheet metal design

This is a design of a V8 engine block inspired barbecue I made during my time at Hogeschool Rotterdam.
The goal was to design a barbecue from sheet metal and assemble it without any additional fasteners.

This design was then made from sheet steel with the use of laser cutting.
Below is an image of the final product.

EBM Bottle

This is a design I made of an EBM bottle during my time at Hogeschool Rotterdam.

Finite Element Analysis

Below is an assignment i made, optimizing the design of a hole punch using FEA.

The analysis of the handle is shown as an example here.
To shorten calculation time, a symmetry constraint was used.

The same applies to the meshing.
By having a coarse mesh on the locations where the precision is not needed, the runtime of the analysis is shortened.

Below are the results of the study, where it’s visible that the yield strength is not passed in any location.

Game development: Unreal Engine

As a hobby project, I’m currently making a mini game. Where you can walk through a production facility and for instance, turn on machines inside.

Below is an example of a glass that is set up in Unreal Engine.

Programming: Rainmeter Skin

In my spare time, i also created a Rainmeter skin for use on my own PC’s.

Rainmeter is a desktop customization tool. You can show the weather on your desktop, a calendar, a clock, or various other things. Which include monitoring of system stats in any way shape or form you want.

I’ve created mine as a basic one which can be easily adapted for any system, so it works with different CPU core counts, multi-GPU setups and so forth.

It can be used as a sidebar for instance, or above the taskbar:

PC Build: Project Ikigai

This project began with the idea of building a desktop PC from wood.
A Japanese theme seemed very fitting with this build.

The main goal was to create a PC that was clean and as quiet as possible. That’s why it has no hard drives, but only SSD’s.
The large number of fans isn’t really necessary in terms of cooling capacity, but allows running them all at very low RPM’s, to keep it quiet.

To get the case itself to be as clean as possible, every possible connector or button was removed. This added the challenge of housing them externally.
This was done by designing a Japanese figure, which is standing on top of the external DVD player.

Below is shown how I designed the inside of the figure in a way that all the cables would fit.

Lots of parts were designed and custom made, but other of the shelf parts, were modified, like the GPU cooler for instance.

Below an example of a custom part, the wooden fan grille with dust filters.

The testing of the hardware and the early stages of the woodwork.

And the end result:

PC Build: Project ERA

The idea for this started about three years ago, when a started to get more serious with 3D-modeling, rendering and making simulations.

So when the X99 platform was introduced, i decided that would be a good moment to build the workstation.

Because the system can be at 100% load when rendering, cooling had to be a priority.

The hard drive cage was removed to allow for better airflow and the SSD and SSHD were combined and housed in the 5,25″ bay.

To accomplish this, a custom bracket was created to mount the SSD to the SSHD in order to fit them both in a single 5,25″ bay.

The color scheme of the build is black with orange details, so almost every component was customized to fit this theme.

Below are some examples, like recoloring LED’s, logo’s fans and cables.

For the first year the system ran aircooled, but the plan always was to do a custom water loop, especially since the reference GPU cooler made it run very hot and loud.

In the meantime, I started creating cable combs and started planning the water loop.

Below a schematic of what I had in mind:

Then, a year later, the real work began. Because the case was quite small, it had to be extensively modified to fit the radiators, fans, pump and hoses.
Even a section of the floor had to be cut out in order to accommodate the 280mm front radiator.

A few custom metal plates were designed and manufactured, to serve as back plates, covers and mounts.

Also, the CPU and GPU blocks could be fitted:

Next up, was test fitting everything, pressure testing and filling the water loop.

Then the last job, the tedious work of cable management begun:

But the final result was worth all the effort.

NoLimits 2: Project Liseberg

This project started out as making a simulation of just one track and kept on expanding, so the idea became to do a large section of the park.

The track which started the project was Balder. At first, the track was recreated using FVD++ (a force vector design program). This way, an accurate representation can be made.

Next up, was creating the trains. These were created in Solidworks and kept as simple as possible, while still maintaining enough detail. This was done to minimize the polygon count.
The trains were textured in Blender, since this supports better UV mapping.

The track was imported in to NoLimits from FVD++ and all the woodwork was then done in NoLimits and a script was created to get the custom trains working.

The next ride to recreate was Kanonen. This was a quite short but complex track.
The image below was created to check the loop shaping / geometry. The recreated track was used as a green overlay.

Below is another comparison between the track in FVD++ and the real track.

I also started some work on the trains from Helix.

The part I’m still working on is the log flume. This time, not only the logs were created in Solidworks, but also the entire track.
The biggest challenge with this, is to get the animations as realistic as possible, both the movement of the logs and the splash effects.

NoLimits 2: Project Norway Demon

The inspiration for this terra roller coaster came from a vacation in Norway. I had the idea for a roller coaster soaring through the fjords and tunnels.